Spiral Herculeo S130WD is a Balance-Type [[[Beyblade (toy)|Beyblade]] that was released in the Ambush Attack 2-Pack with a recolored version of Bakushin Susanow 90WF.
Face Bolt: Herculeo
This Beyblade represents the face of the Greek demigod, Hercules. In Greek myths, Hercules had 12 labours that he had to accomplish. He was hated by the goddess Hera, shown by her attempts to kill him on his labours.
Energy Ring: Herculeo
Herculeo has even weight distribution making it a good Energy Ring. It has two lion heads representing the invincible hide of The Nemean Lion, which Hercules killed in one of his tasks, on the Energy Ring. The Energy Ring is blue in colour with black designs on the lion heads.
Attack: 3 Defense: 2 Stamina: 2
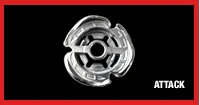
Fusion Wheel: Spiral (Screw)

Spiral resembles a distorted version of Storm with three wings that curve upwards and line down with a small gap between each wing. Each wing has a slope that is bigger than the other one, and features oval-like protrusions that appears to slightly push-up for Smash Attacks. Before it's release, Spiral was said to be able to conduct Upper Attack due to the slopes, however upon testing, it did not show much Upper Attack at all.
While not having the correct slopes for Upper Attacks, it is however able to conduct Upper Smash Attacks. Spiral is a powerful Attack-Type Fusion Wheel but is outclassed by other Wheels like Beat, Lightning, and Variares. Despite this, Spiral can deal a great amount of Upper Smash Attack if used with the right Energy Ring.
Specifically, small Energy Rings that expose more of the metal of Spiral, Pisces and Tempo are recommended, however Pisces has better use. Spiral can be used very effectively in the balance combo MF Spiral Tempo (Screw Horogium) 90MF.
Attack: 5.5 - Defense: 1 - Stamina: 0.5
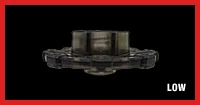
Spin Track: Shield 130 (S130)
- Weight: 3.34 grams
S130 is a special Track with a ring around the Track's core. This Track was designed originally to be the largest Track in width so it could absorb hits, and to reduce recoil, but BD145 is wider and absorbs hits more effectively. However, you can't use the exclusive Boost Mode so BD145 is not recommended with Jade. S130 is a rare height, as there are only a few Tracks with the same height: WA130 and 130, but this height is relatively pointless, and does not offer many advantages except Balance.
This Track can be used in a useful combo MF Gravity Perseus S130RF/LF/MF/LRF/R2F, which with the multi rotation of Gravity, and the over hanging of the Metal Wheel, this combo can take out most low heighted Beys, as well as the S130 height taking out higher Beys.
If this Bey comes into contact with a low height Attack combo, S130 should be able to reduce the recoil. It is outclassed by BD145 (if used with Hell), UW145. SW145, and TR145. Poison Giraffe is the first Beyblade to use this track.Jade Jupiter and L Drago Guardian use this spin track as well.
Performance Tip: Wide Defense
- Weight: 0.7 grams


Wide Defense (WD), as it's name implies, is the widest of the Defense series of Performance Tips (D, SD, PD). When compared to D, is still contains the gear-like shape and is of course wider with the Sharp tip wider and taller as well. WD also retains the two curved holes D contained but are now thinner, smaller and found on the Sharp tip.
Being wider brings advantages and disadvantages to WD. An advantage is being able to conserve better Stamina than D and SD, due to the more surface area as well as being able to spin at a lower spin-rate that that of D or SD which cannot. A disadvantage however, is that it's worse at regaining balance than D. The wide shape gives WD a harder time to regain it's balance whereas, D does it much easier. This can be terrible, when faced with an Attack-Type. Although, this should not be kept as a worry as it can be an advantage. This should take into consideration when using a Spin Track such as 230 or TH170. D would be a better choice than WD as it would regain balance much easier to help cope with 230. However, while D can regain balance better, it cannot maintain it as well as WD, especially with heights of 170 and above.
At release, WD has found quick use as a Stamina-Type Tip, much better than D and has become top-tier. Despite this however, as many more Performance Tips like AS, EWD, and B:D were released; they have overshadowed WD. EWD has also overshadowed WD due to EWD's bearing to regain balance better and much better Stamina. W²D performs basically the same as WD though but with worse balance but better attack.
Despite all of this, WD is still a great Performance Tip for Stamina despite its many releases. Just like the rest of the D series, WD has use in Stamina. So in all in all, even though WD may not be the best Stamina-Type Tip, it still has use in the metagame and most importantly, is still, a great Stamina/Defense-Type Performance Tip. It is translucent in color.
WD is works wonders with spin stealing beys. Most of them think Earth is a spin steal survivor, but it works only with Earth Eagle 145WD, and not Earth Virgo GB145 BS . It is only because of WD's wobbling ability. However, the 4D Performance Tip, B:D (Bearing Drive), is recommended because of better stamina, defense, and balance.
Some Bladers experience a fast movement from WD, allowing the bey to dodge attackers, attack, or weaken the impact when hit by another bey. With this Performance Tip it moves in a slow movement and doesn't get hit around the stadium as much. It is clear in color.
Attack: 0 - Defense: 5 - Stamina: 2
Trivia
- This is one of the few Beys that have the S130 Spin Track. The others are: Poison Zurafa S130MB, Jade Jupiter S130RB, and L-Drago Guardian S130MB.
- However, this is the first to not use it with the MB or RB Performance Tip.
- This is the fourth time the Spiral fusion wheel that was released, the others are Spiral Capricorn 90MF, Spiral Fox TR145W²D, and Spiral Lyre ED145MF.